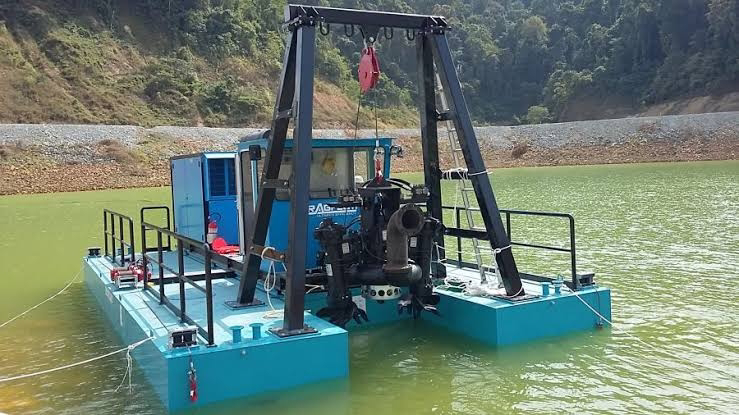
Assembling a vertical turbine pump
Assembling a vertical turbine pump involves several steps to ensure proper installation and functionality. Here's a general overview of the assembly process:
Preparation: Gather all the necessary components and tools required for assembly. Ensure that the work area is clean and free from any contaminants that could affect the pump's performance.
Inspect Components: Before assembly, carefully inspect all components to ensure they are free from defects or damage. This includes the pump bowl, column pipe, impellers, shaft, bearings, seals, and any other associated parts.
Install the #Pump Bowl: Begin by installing the pump bowl at the desired location, typically a well or sump. Secure the bowl to the base or foundation using appropriate fasteners.
Attach Column Pipe: Insert the column pipe into the pump bowl, ensuring it is properly aligned and seated securely. The column pipe provides the pathway for water to flow from the pump bowl to the surface.
Install Impellers and Shaft: Assemble the impellers onto the pump shaft in the desired configuration. Ensure that each impeller is spaced appropriately along the shaft and secured tightly to prevent slippage during operation.
Lower the Shaft into the Column Pipe: Carefully lower the assembled shaft with impellers into the column pipe. Take care to avoid damaging the impellers or other components during this process.
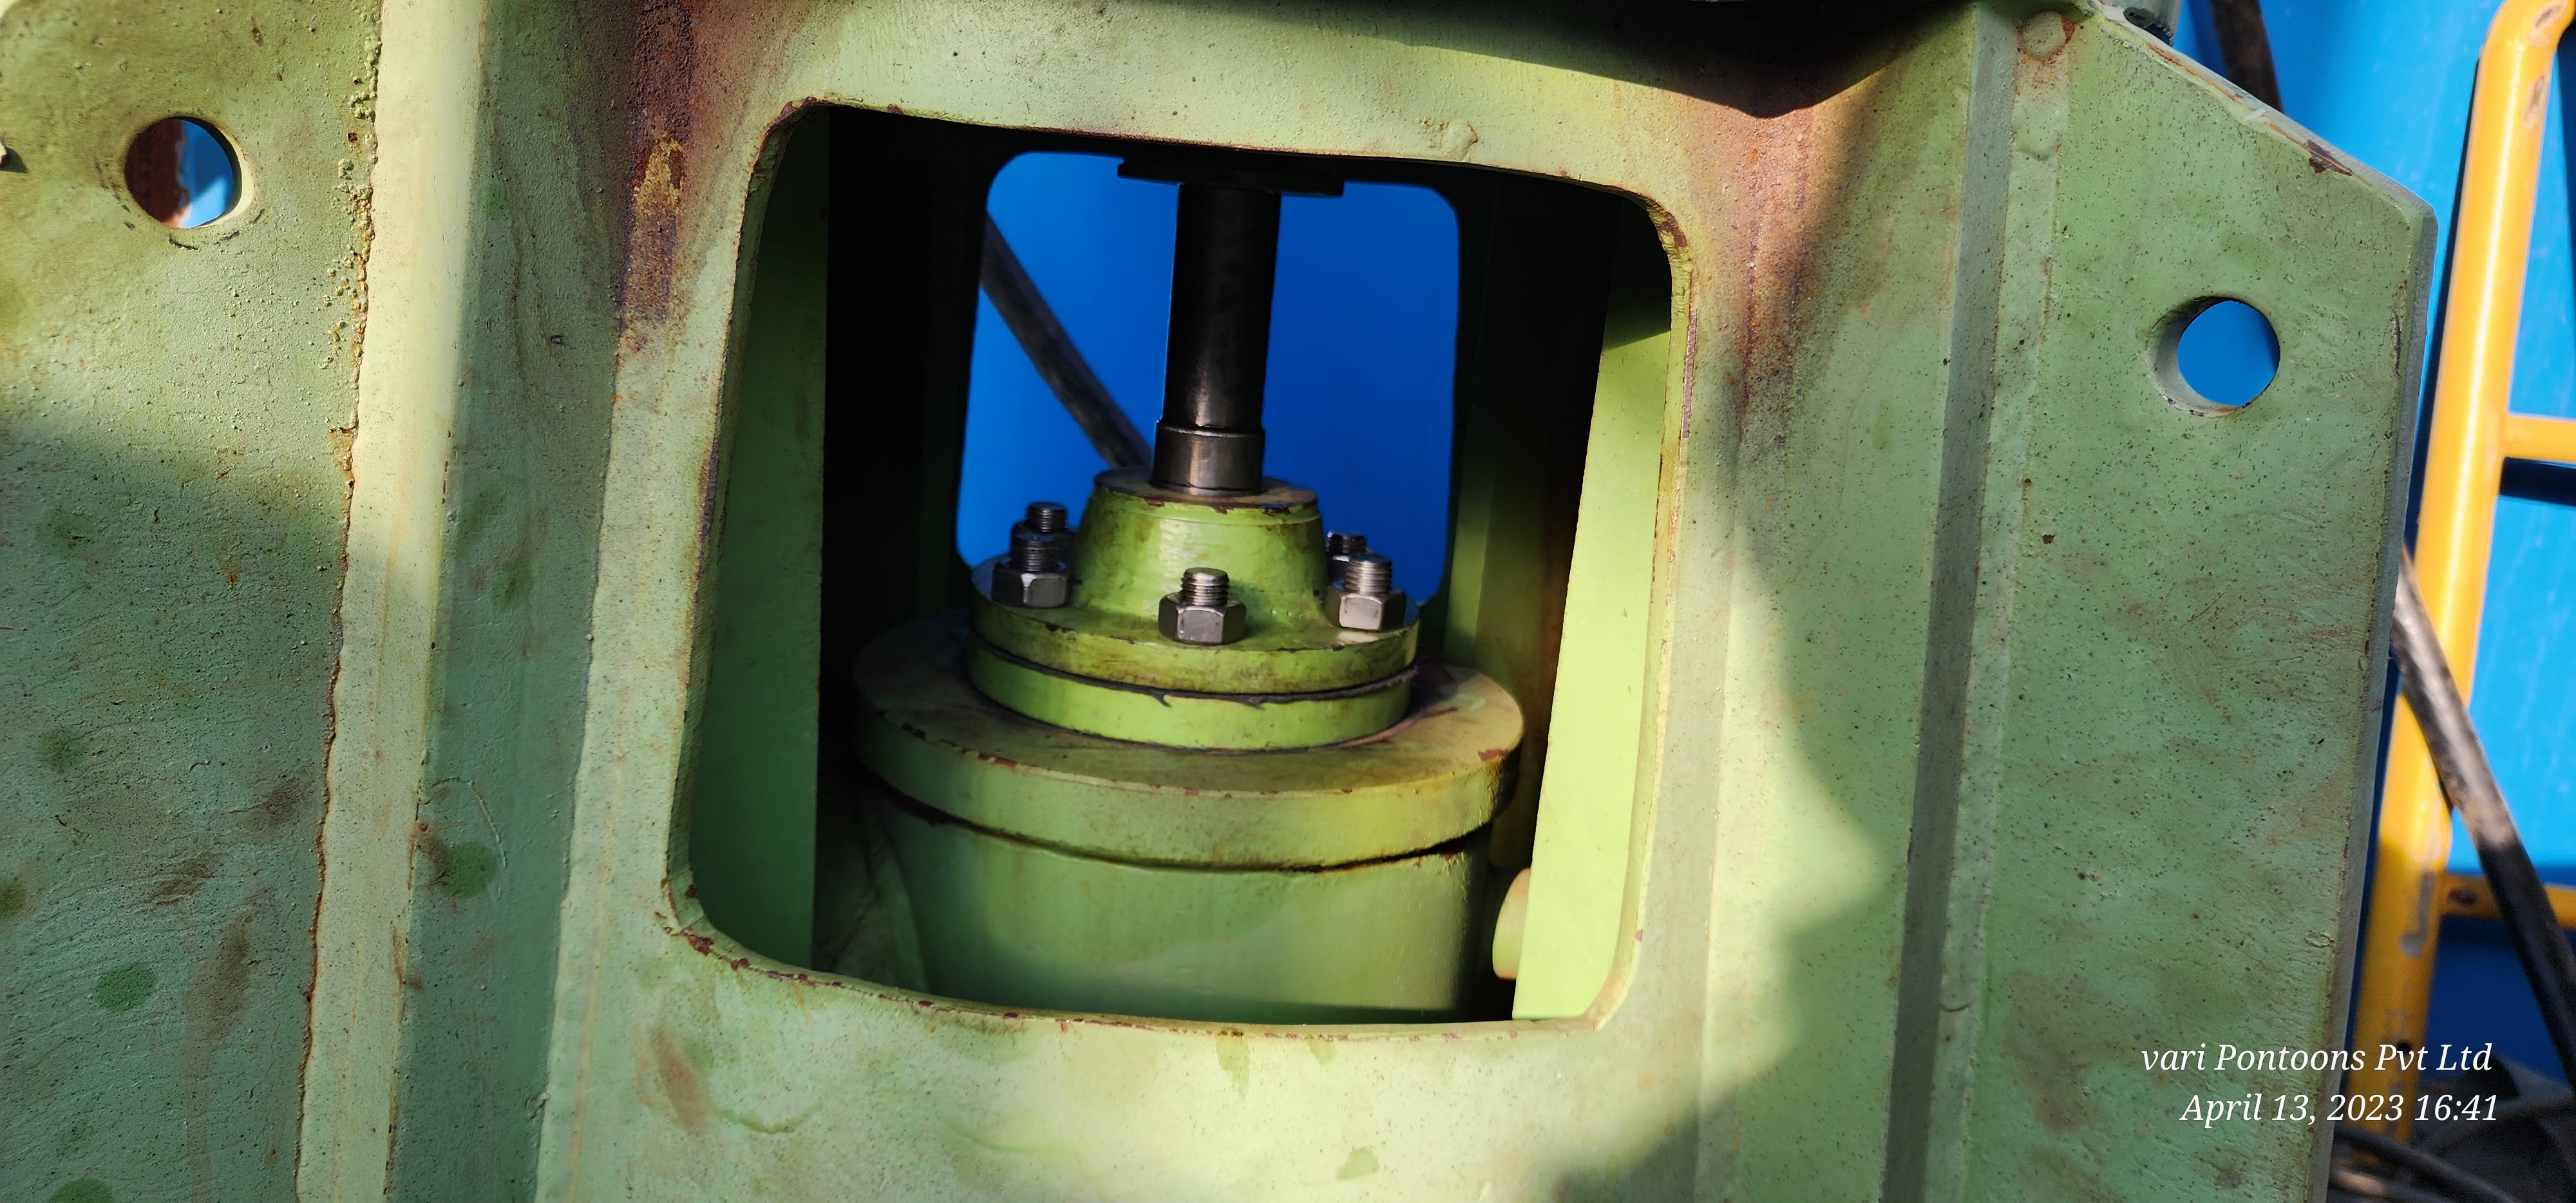
Install Bearings and #Shaft Support: Assemble and install any bearings or shaft support structures as required by the pump design. Bearings help support the shaft and reduce friction, while shaft supports provide additional stability.
Attach Motor and Coupling: If the pump is driven by an electric motor or engine, attach the motor or engine to the pump assembly using an appropriate coupling. Ensure that the coupling is properly aligned to prevent excessive vibration or misalignment issues.
Connect Discharge #


Piping: Install discharge piping to connect the pump outlet to the desired distribution system or storage tank. Use appropriate fittings and gaskets to ensure a secure and leak-free connection.Final Inspection: Once #assembly is complete, perform a final #inspection of the pump to ensure everything is correctly installed and aligned. Check for any loose components, leaks, or signs of damage.
Testing: Before putting the pump into service, it's essential to test it to ensure proper functioning. This may involve running the pump under various conditions to verify that it operates as intended and delivers the required flow rate and pressure.
Documentation: Keep detailed records of the assembly process, including any adjustments made and test results obtained. This documentation can be valuable for troubleshooting or future maintenance.


It's important to note that specific assembly procedures may vary depending on the design and manufacturer of the vertical turbine pump. Always refer to the manufacturer's instructions and guidelines for the most accurate and up-to-date information. Additionally, if you're not familiar with the assembly process or lack the necessary expertise, it may be advisable to seek assistance from a qualified technician or engineer.

Comments
Post a Comment